Click on ![]() to return to start of page
to return to start of page
This is a GUI tool that manages multiple packages, giving access to CMT, Visual C++, and cvs. The individual options have context menus in the tool.
Navigate this page:
WSH (Windows Scripting Host) version 5.1 and Internet Explorer 5.0 or greater must be installed. To see if you have it, type "cscript" in a command prompt window and examine the version number. If you don't have it, it can be downloaded from Microsoft. (Upgrading to the current 6.0 also installs WSH 5.1.)
In fact, right now, make sure you can execute cscript from a Windows command line. If not, update your path appropriately.
Getting VCMT from the CVS repository
1. Copy the files to local directory. From the GLAST cvs repository it could be:When doing a CVS checkout for VCMT the directory structure for the VCMT installation has to be specified, e.g.
<dir> should be replaced by c:\glast\vcmt\v11 if that is where you want to store your VCMT
When doing a CMT checkout for VCMT then CMT sets up the directory structure itself
Now to finish the VCMT setup, you need to tell VCMT
where CMT is located and what version you are using. Go to the bottom
left side of the VCMT screen, you will see a section called "CMT
setup". There you will fill in the values for root
and version:
root specifies the directory that contains the CMT folder.
C:\GLAST\tools
version specifies the CMT version to use
v1r10p20011126, for example.
These settings are stored with your CMT installation, so you will not have
to set them again. If you later install another version of CMT, you
will update the root and version entries
accordingly.
The CMT path denotes all directories recognized by CMT. It lists all directories that can be used to stored packages retrieved from the CVS repository. VCMT provides a mechanism to set the CMT path, in the CMT setup section of the VCMT window. One sets the CMT path by editing the path text box, for example, we could have 3 directories in our CMT path:
C:\glast\GaudiSys_v7
C:\glast\gismosys_v5r4p1
C:\glast\pdrApp_v7r1
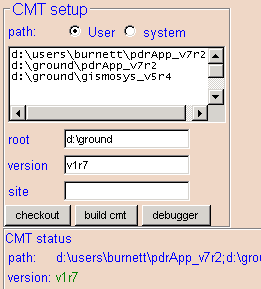
The GLAST convention is to setup a separate directory for each checkout package. This allows users to mix and match sets of checkout packages without requiring multiple copies of a package on a user's machine.
To add a new directory to the CMT path
Edit the text in the CMT setup path text box.
If the directory you add does not yet exist, VCMT will offer to create it for
you.
NOTE: You should not have multiple versions of the same package in the CMT path at the same time.
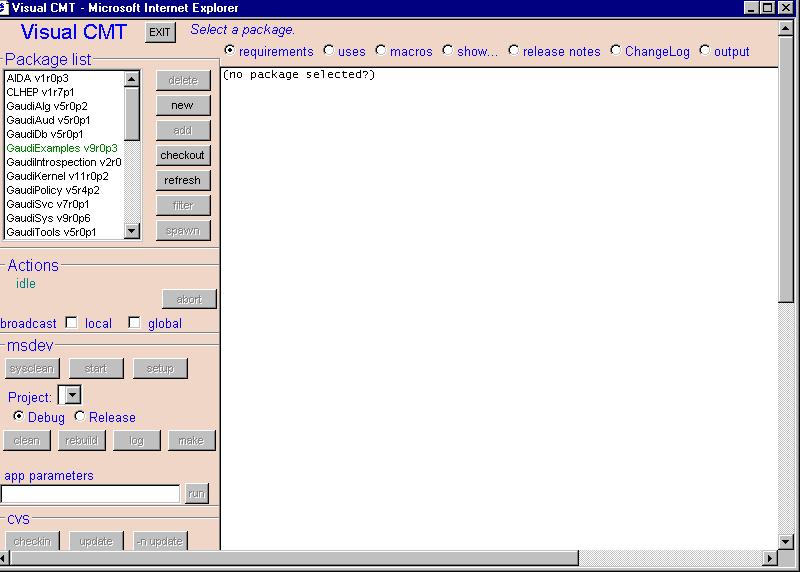
Package List
Lists all packages installed on your machine.
The package listed will appear in green, black, or red:
Green
The package
has been checked out completely and it is a new package.
Black
A package and
its dependent packages have been checked out.
Red
A package
has been checked out but it is not complete i.e. its dependent packages are not
available in the CMT path.
In the packages area, hit the checkout button
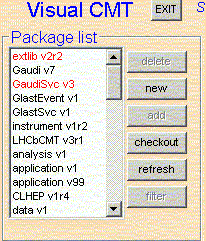
Select (for example) tbsim v1r1, and have it
go into a directory of your choice. This directory must have been specified
the CMT paths.
NOTE: Make sure the cmt version text box is
left blank if you are trying to checkout a tagged version of a package.
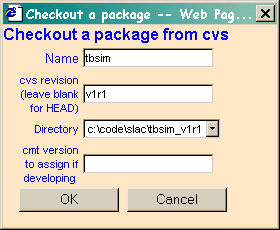
After clicking the OK button, the package name should then appear in red in the package list. After selecting it, you can examine the packages that are being requested.
If the package you checked out is a checkout package then you can click the add button. This will recursively checkout all the packages into this directory.
For other packages you need to individually checkout each package that it depends on.
Most of GLAST code currently depends at least on the CERN LHC++ CLHEP component. The package EXTLIB defines installation-dependent environment variables, for example EXT_DIR, depending on the value of a predefined environment variable GLAST_EXT.
Here is a link to the external libraries page External Libraries
There are 2 ways of doing this. But before you build the code you need to check that you have installed all the external libraries that are required by that package. The instructions for getting these external libraries are the next step in this CodeHowTo. So please follow them before you build or run the code.
Select the application you wish to build. For this example, it will be gsimw, the 'GUI' version of GlastSim. This will highlight 'all' in the project list. Set the broadcast check box so that all the packages that gsim depends on will also get built. Next hit the 'setup' button; this will create all the Visual Studio files needed for the build process.
Now set the broadcast check box again and then hit the make button.
If all the dependent packages are in the same directory then you should check local broadcast, if they are in different directories then you should check global broadcast.
The above step makes all libs and dll's in the given package, as well as any libraries for dependant packages. To actually build the executable, you now need to change the project to the executable ('gsimw' in this case) and then click 'make'. You do not need to click the broadcast button, as all the needed dependant libraries have been built in the previous step.
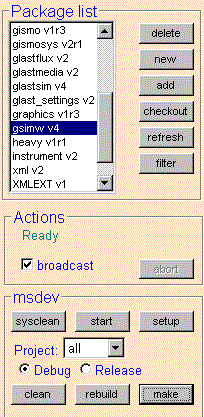
Click the "start" button to start an instance of Visual Studio with the workspace for the package. The workspace will contain projects for each constituent, as well as the library-building projects for all dependent packages.
From within VCMT
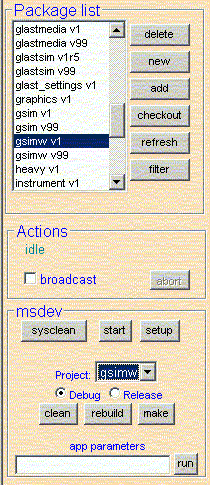
Select the package with the app you want to run. Then select the app from the project drop down list and hit the 'run' button. All the setup is done for you. Enter needed command line arguments into the box marked 'app parameters'.
(method not recommended; your mileage may vary depending on the CMT version you use)
In order to run any application via command line in Windows you should follow these steps
1. Start a DOS command prompt window
2. Enter the CMT directory of the package containing the application.
3. Type "setup.bat" to set up the necessary environment variables.
4. Note that the executables will be located in the directory Win32 or Win32Debug
5. Choose the version you desire to run and enter the proper path and executable name to run the program; something like ../Win32debug/gleam.exe
Using Visual Studio
Of course VCMT does not help develop code. When you need to modify code or debug a program, clicking start in the msdev section starts Visual Studio with the selected package's workspace. It will contain the projects declared by the selected package, as well as all dependent libraries from other packages. Thus development of multiple packages can be done by starting with a root package.
If doxygen is in your path, you can use it to generate and browse documentation.
All commands are executed in the root directory of the selected package. Common cvs commands are accessible by the click of a button: output is captured into the output pane for the selected package. Any DOS command can be typed into one of the two boxes and run by clicking the associated run button.
VCMT Help: VCMT help is available by hovering over any button in the VCMT window. A help page is built in, click on Visual CMT or any of the headers.
This built-in webpage can also be found online right here. VCMT Help
Last Modified January 21, 2003
Back to Main Menu Previous step Next step